This tutorials are based on the DirectX Tutorial, show how to deal with the render depth problems using DirectX 9.
Understanding the Problem At Hand
Let’s say we wanted to draw two triangles, one behind the other, and then view them from an angle where the farther triangle was partially behind the other. If we did this with what code we’ve covered so far, this is how that might look:
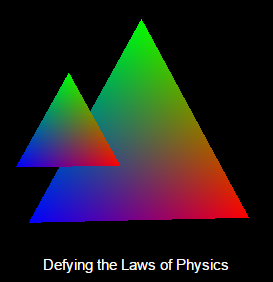
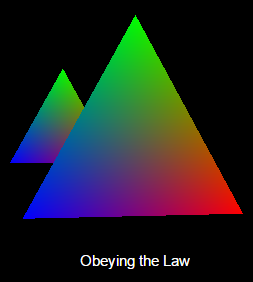
This, unfortunately, defies the laws of physics. Things that are farther do not usually appear in front of closer things, especially when the closer thing is blocking it. The way it should appear is like this:
How This Works (or rather, why it doesn’t)
When a model is rendered, several things happen. First, Direct3D calls up the pipeline you built. It is all neatly packed away in memory. Direct3D takes this and processes each model, one at a time, into a 2D image. Immediately after creating that image, it is drawn to the back buffer.
After the first image has been drawn to the screen, the next model is taken up, processed, and drawn to the back buffer. However, no matter where the model was placed in 3D space, the second image is shown over the first one, and you get the result shown in the first image.
Fortunately, Direct3D provides an easy solution to this. The solution is known as a Z-Buffer.
Z-Buffer
is simply a large buffer that keeps track of the distance from the camera of every pixel on the screen.
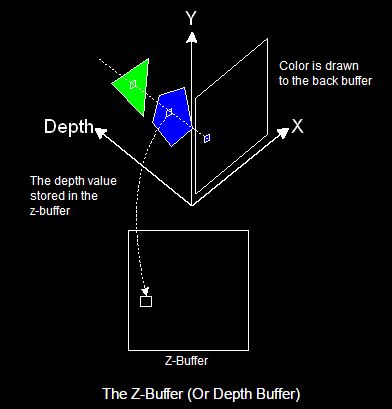
Whenever a pixel is drawn, it takes the closest pixel to the camera and draws that on the back buffer. At the same time, it stores the depth value into the same spot in the z-buffer, so that the next time something is drawn
There are some steps to get Z-Buffering.
Step 1. Setting the Appropriate Presentation Parameters
D3DPRESENT_PARAMETERS d3dpp;
ZeroMemory(&d3dpp, sizeof(d3dpp));
d3dpp.Windowed = FALSE;
d3dpp.SwapEffect = D3DSWAPEFFECT_DISCARD;
d3dpp.hDeviceWindow = hWnd;
d3dpp.BackBufferFormat = D3DFMT_X8R8G8B8;
d3dpp.BackBufferWidth = SCREEN_WIDTH;
d3dpp.BackBufferHeight = SCREEN_HEIGHT;
d3dpp.EnableAutoDepthStencil = TRUE;	// tell D3D to create it automatically
d3dpp.AutoDepthStencilFormat = D3DFMT_D16;	// This means that each pixel is 16-bit.
Step 2. Turning On Z-Buffering
d3ddev->SetRenderState(D3DRS_LIGHTING, FALSE);    // turn off the 3D lighting
d3ddev->SetRenderState(D3DRS_ZENABLE, TRUE);    // turn on the z-buffer
Step 3. Clearing the Z-Buffer
d3ddev->Clear(0, NULL, D3DCLEAR_TARGET, D3DCOLOR_XRGB(0, 0, 0), 1.0f, 0);
d3ddev->Clear(0, NULL, D3DCLEAR_ZBUFFER, D3DCOLOR_XRGB(0, 0, 0), 1.0f, 0);
You can get the complete codes from Github
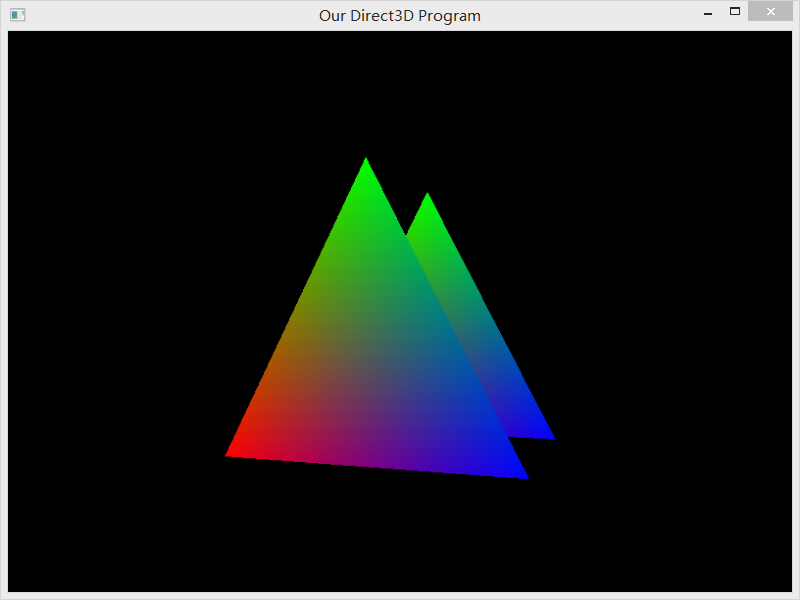
If you run this program you should get something like this: